
Your MISAC workspace starts with one person in it: you. This guide shows how to invite a colleague by email, and how to see and cancel invitations that have not been accepted yet. It also explains user groups (roles), which decide what each person can do. Finally it covers seats, because every person who joins takes one seat on your plan.
Before you start
- You must be signed in to the workspace you want to invite people to. If you have more than one workspace, switch to the right one first. See Create and switch workspaces.
- Inviting is for the workspace owner or an administrator. Other users see the invitation window but are told they need administrator rights.
- Have your colleague's email address ready. The invitation is sent to that address, so check it carefully.
- Check your seats first (step 3). On the Free (Demo) plan the workspace has one seat, and you are already using it.
Step by step
Open the Team tab
-
Click the person icon at the top right of the screen (its tooltip says My Account).

The My Account button at the top right of the screen -
The My Account panel opens on the right. Click the Team tab.

The My Account panel with the Profile, Security, Company, Team and Plan & Billing tabs The Team tab opens with the list of your workspaces, marked with the one you are in:
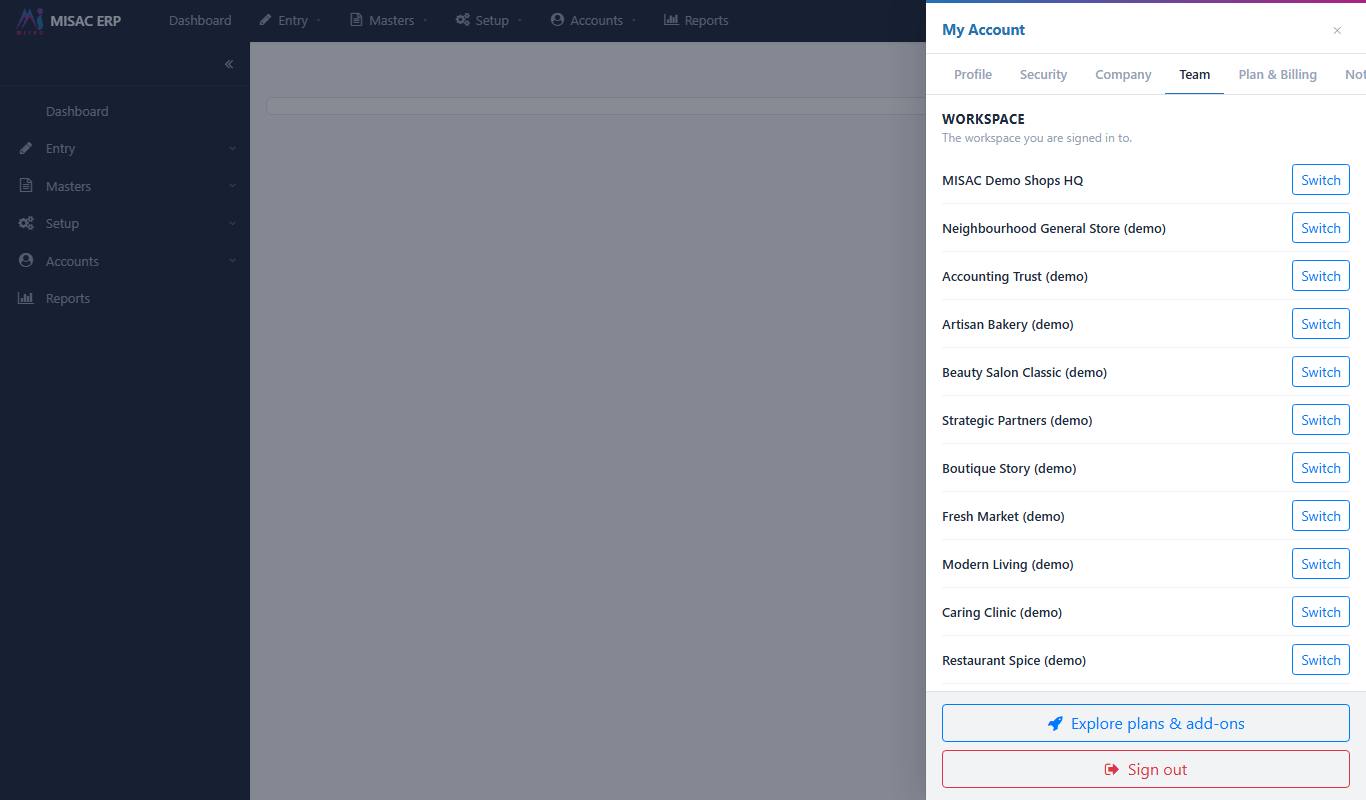
The Team tab showing the list of workspaces -
The Team tab lists your workspaces at the top. Scroll down past them to Seats, Members, Owners and Invitations. Seats in use shows how many seats are taken out of how many your plan includes, for example "1 of 1 seats". Members lists the people who have a seat.

The Seats, Members, Owners and Invitations sections of the Team tab Owners are a separate list: they are the people who can hand the workspace over and manage the bill. See Workspace owners and the billing owner.
Invite a colleague
-
Under Invitations, click Manage invitations. The Invite a user window opens, with the list of invitations underneath.
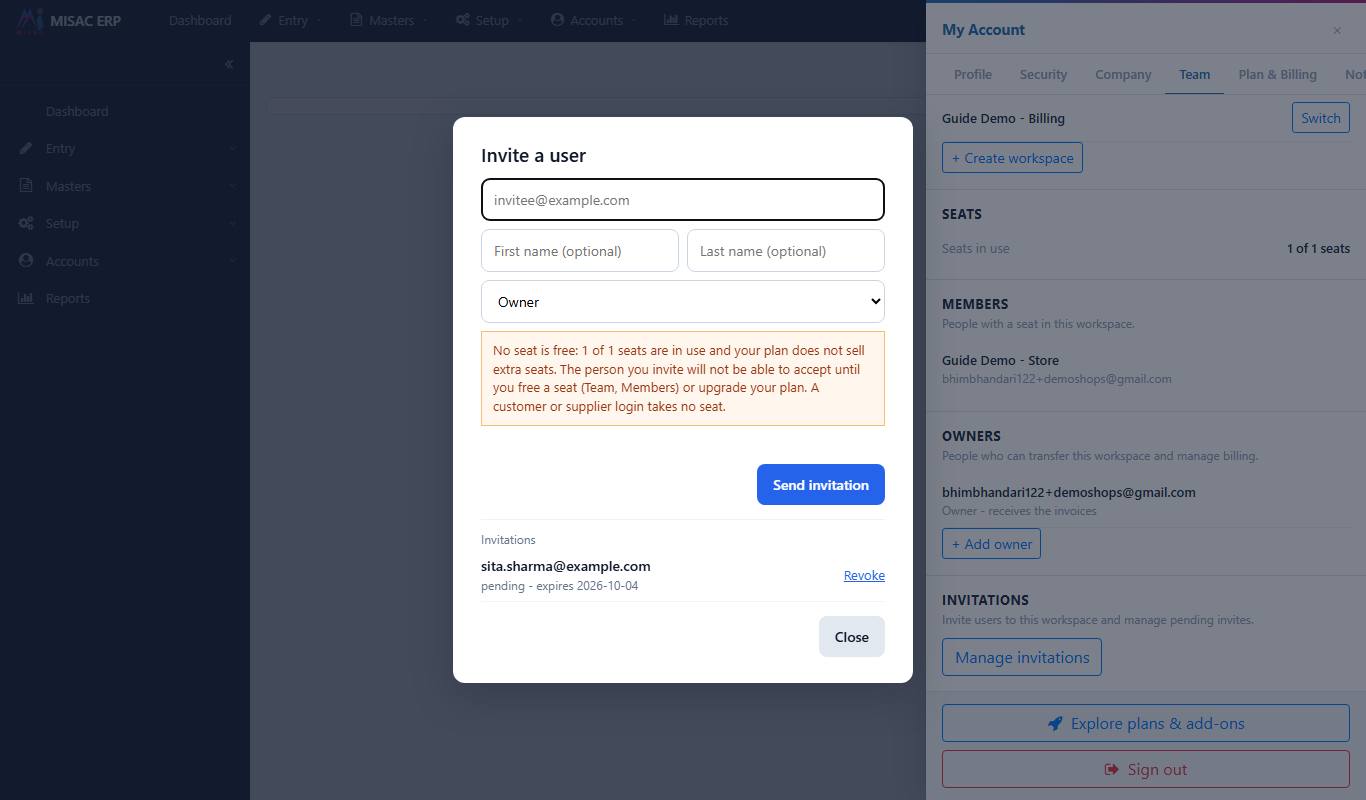
The Invite a user window with an email box, name boxes and a user group list -
Type your colleague's email address in the first box, for example [email protected].
-
Type their First name and Last name. Both are optional, but they make the invitation friendlier and the member list easier to read.
-
Choose the user group they will belong to from the list under the name boxes. The group decides what they can see and do (see "User groups in plain words" below). In a new workspace the only group is the built-in Owner group, which gives full access to everything.
If every seat on your plan is taken and the plan does not sell extra seats, the window says so ("No seat is free ...") and Send invitation asks you to confirm first: the person cannot accept until you free a seat or move to a bigger plan.
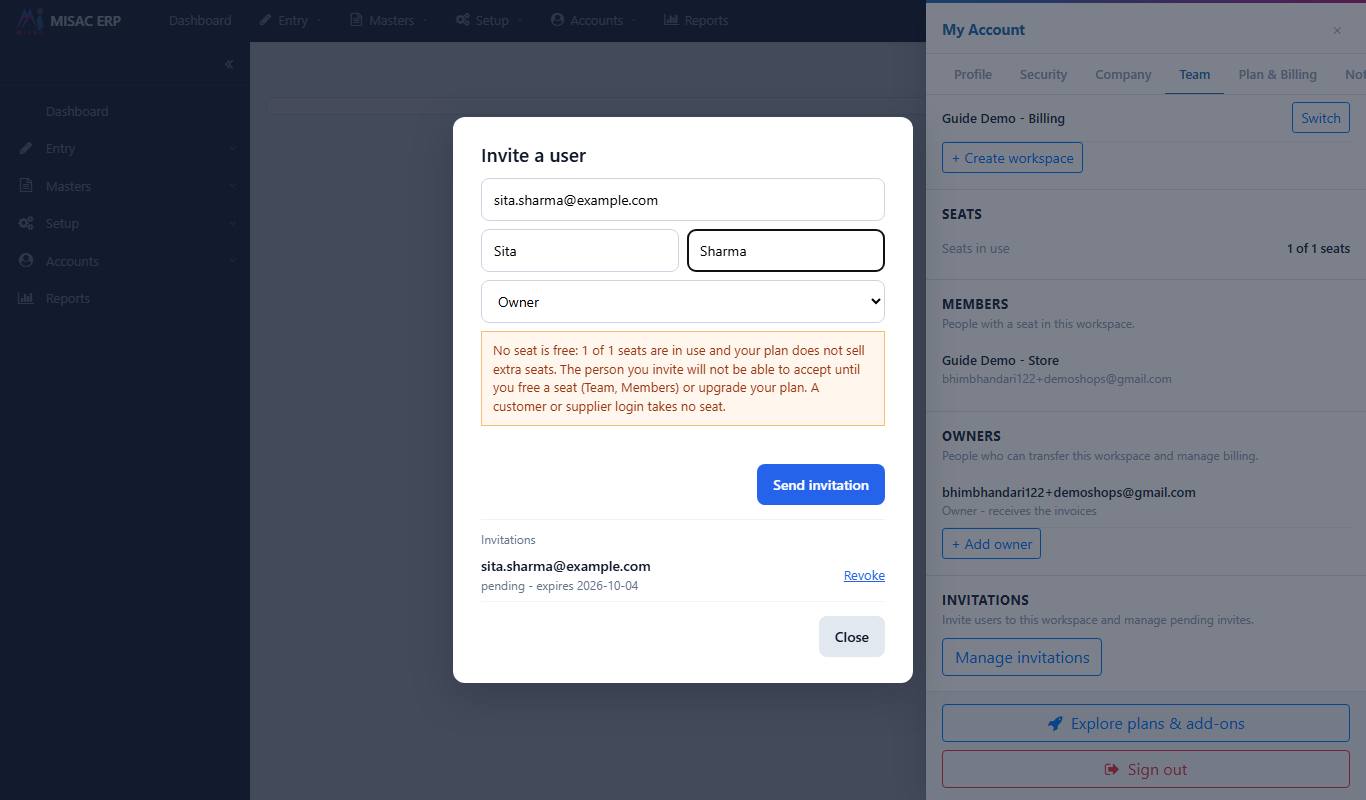
The invitation filled in with an email address, a name and a group -
Click Send invitation. The button changes to "Sent - resend in 58s", and the invitation appears in the list as pending, with the date it expires. An invitation is valid for 7 days.
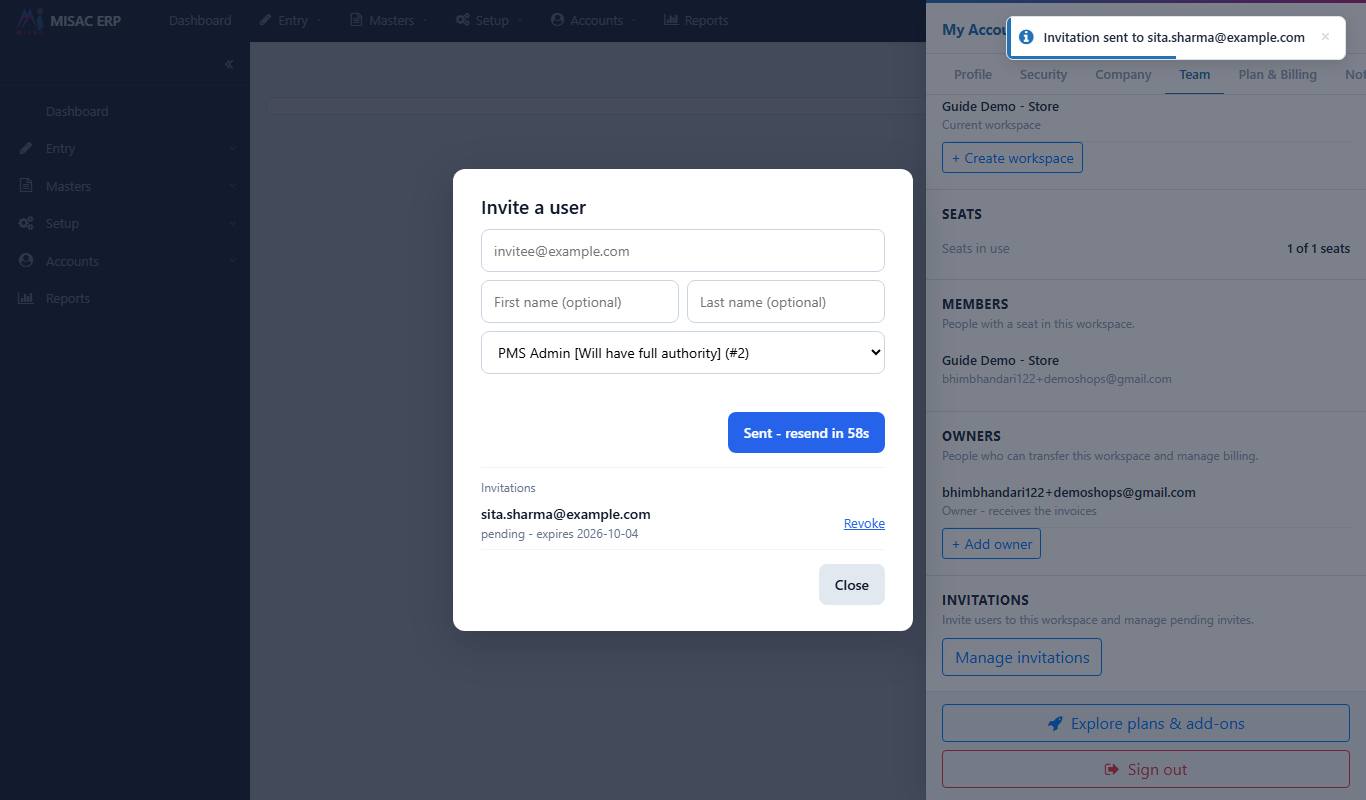
The invitation listed as pending, with its expiry date and a Revoke button -
Click Close when you are done.
Cancel an invitation
- Open Manage invitations again and click Revoke next to the pending invitation. The link in the email stops working at once. Invitations that were accepted or have expired show their status instead of a Revoke button.
User groups in plain words
Every person in your workspace belongs to exactly one user group. The group is their role. It decides which screens they see and what they may do on them. You never set permissions person by person. Instead, you design the group once and put people in it.
-
To see your groups, open Setup > User in the menu on the left. User Group Manager lists the groups you have made and lets you add, rename or remove one. Access Roles is where you decide what each group may do.
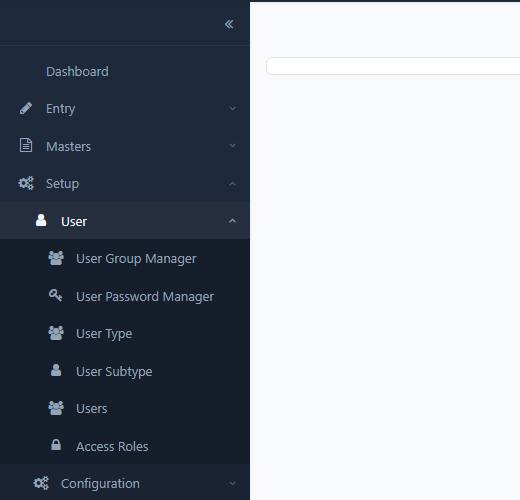
The Setup > User menu with User Group Manager and Access Roles -
Click Access Roles. The left side lists your groups. The Owner group is built in, can do everything, and cannot be edited.

The Access Roles screen with the built-in Owner group -
To make a new role, click + New group and give it a name that describes the job, for example "Shop staff" or "Site accountants". A new group can do nothing until you give it roles, so nobody gets access by accident.

The New group window asking for a group name -
Select the group and choose its access, one row per area of your business:
- Requester: raises documents and sees only their own.
- User: enters and edits the documents of that area.
- Manager: reads and approves documents in that area, but cannot create them (on purpose).
- For the whole company: Accountant (posts to the ledger), Controller (can also reverse and cancel postings) and Owner (everything).
Quick picks such as Storekeeper, Store Manager, Purchase Officer and Accountant fill the rows in for you. The screen shows, in plain words, what the group will be able to do before you save.
-
Once the group exists, it appears in the list when you invite someone (step 7), and you can move existing people into it from the People tab on Access Roles.
Seats and what they cost
-
Open My Account > Plan & Billing > My Plan and scroll to Seats. It shows the seats in use out of your plan's seats and lists who holds each one. An owner can click Release seat to free someone's seat without deleting their login.
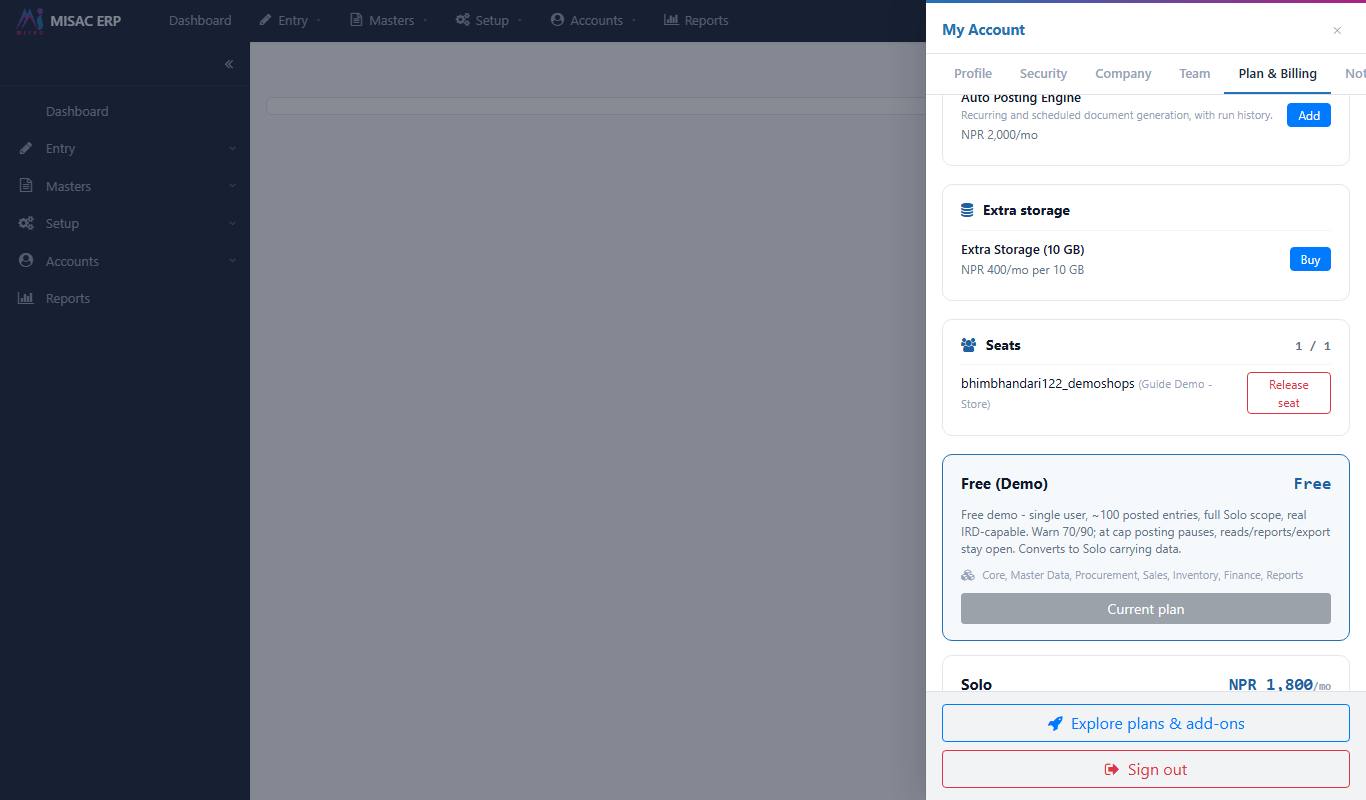
The Seats block on the plan page, showing 1 of 1 seats Each plan includes a set number of users, shown in the plan descriptions lower down the same page:
Plan Users included Price per month Free (Demo) 1 Free Solo 1 NPR 1,800 Medium up to 5 NPR 2,400 Large up to 10 NPR 3,600 Max up to 30 NPR 4,800 Prices exclude 13% VAT. On a paid plan you can go over the included number. Each extra user is charged monthly, and the Seats block then shows an Over cap line with the extra cost. The Free (Demo) plan does not sell extra seats.
What happens next
- Your colleague receives an email with a link. The link opens a page where they choose a password and join your workspace. When they accept, they take a seat and appear under Members.
- If the workspace has no free seat and the plan does not sell extra seats (the Free (Demo) plan), accepting is refused and the invitation stays pending. Free a seat or move to a plan with more users first. See Your plan page.
- The new member sees only what their user group allows. You can change their group on Access Roles at any time. If they are signed in, the change shows once they reload the page.
Common questions
The invitation window says "Administrator privileges are required to manage invites."
Only the owner or an administrator can invite people. Ask the owner of the workspace to send the invitation, or to put you in a group with administrator rights.
The group list only offers "Owner".
That is the owner group, and in a new workspace it is the only one. Anyone invited into it gets full access, including your books and your plan. Create a group with less access on Access Roles first (steps 12 to 14), then invite the person into that group.
My colleague did not receive the email.
Check the address in the invitation list. Ask them to look in their spam folder. Wait for the "resend" timer to finish, then send the invitation again, or revoke it and send a new one to the correct address.
The invitation has expired.
Invitations last 7 days. Send a new one from Manage invitations.
My colleague could not join: it says the workspace has no free seat.
Your plan's seats are all in use and the plan does not sell extra seats. Release a seat you no longer need on My Plan > Seats, or move to a plan with more users.
I want someone to see only their own documents.
Give their group the Requester level for that area on Access Roles, or set the group's records to Own only. Their colleagues' documents then stay hidden from them.